Cozy Nook - Pt. I
- DuoPaar Team

- Jun 9, 2025
- 3 min read
Updated: Jun 23, 2025
The Project

In this first post about the Cozy Nook, we present the project in its most general aspects. Our intention here is to show you how it was designed structurally and visually.
The building was designed for a plot of land made up of two plots measuring 10m in front and 20m in depth, resulting in a total area of 400m². The building was designed to be centralized on the plot, leaving setbacks of approximately 3.5m from the side and 5m from the back. Based on this information, and considering that the land follows the urban indices as shown below:
TECHNICAL | INFORMATION |
Land area | 400 m² |
Computable Built Area | 214,45 m² |
Built (projected) area | 180,98 m² |
Permeable area | 250,60 m² |
URBAN | INDICES |
C.U. | 60,36% |
O.R. | 45,23% |
P.R. | 62,65% |
C.U. - coefficient of utilization O.R. - occupancy rate P.R. - permeability rate |
Structure
Because we wanted a lighter building, with a slimmer structure and high ceilings, we worked with beams and pillars in metal profiles. The masonry walls were thermally insulated to receive the different coatings applied, which will be explored as the rooms are explained.

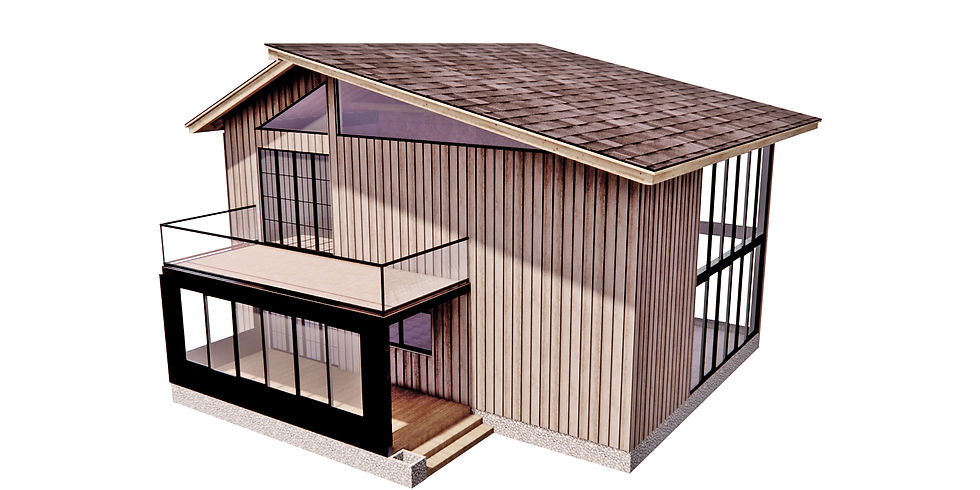
The roof was built using the American shingle style. A wooden base is made, on top of which a waterproofing blanket is placed, which is then covered by this tile. This combination of materials gives the roof a structure that is safe from infiltration.

The frames are made of black-painted metal, with double panes of glass to improve thermal comfort. In addition, they are translucent glass, to preserve a little privacy in the interior. Only the bathroom door has completely frosted glass, with white sandblasting, to give the room more privacy.


About the facades
The facades are all clad in wood, giving them a more rustic, natural look that feels welcoming and warm. The slats were positioned vertically to extend the height of the chalet. The cladding chosen was plastic wood with an oak appearance. It is an ecological, durable, weather-resistant material that requires minimal maintenance, almost zero compared to natural wood.
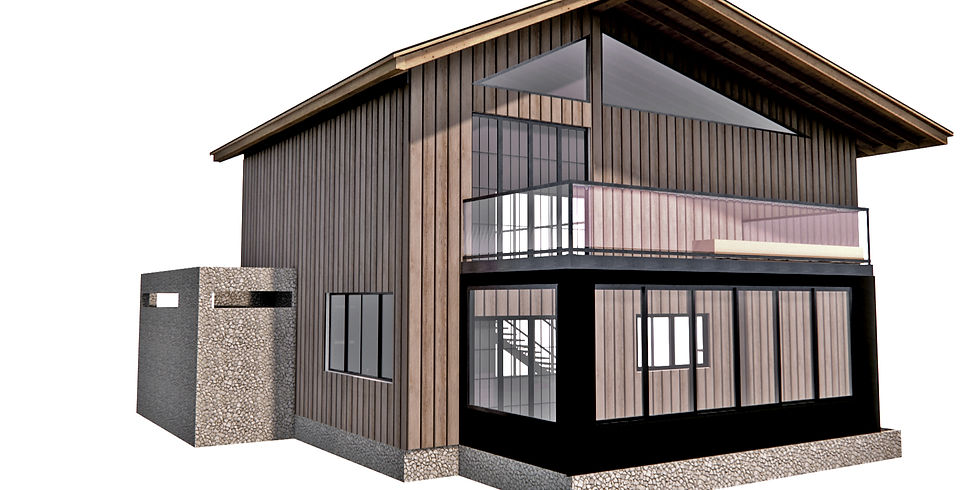
The front facade has a balcony on the lower floor, which serves as a base for the deck on the upper floor. In addition to the physical prominence, the external wall is black to visually detach the balcony from the wooden facade. Another important detail are the upper windows. Triangular in shape, they follow the slope of the roof and let in natural light throughout the day, making the environment more pleasant and providing a long stay.
Seen from the front, the chalet has a cut-out volume because, in addition to the veranda, at the back there is the bathroom volume, which comes out of the building, creating an annex volume.
Moving on to the back facade, the volume is less jagged, even with the bathroom walls sticking out a little. This facade has a large opening, a large window, which uses double-height ceilings, followed by the side, which remains simple, with no distinctive cut-outs, highlighting the large window.

On the other side facade, the volume is closer to the front. The volume of the bathroom creates a cut-out space, allowing for the creation of a patio next to the kitchen window.


All the facades are clad in light natural stone, all around the perimeter of the chalet. The stones run up the outside walls of the bathroom, to emphasize the fact that part of the bathroom juts out from the facades, creating extra volume in them.
Sectorization and Layout
Before creating the project's final layout, several studies were carried out on how the rooms could be arranged. We arrived at the zone map:

With the environments resolved, some layout sketches were drawn up. The resulting floor plans had the following configurations:


We also present two sections to show the interior overview:


Want to see more?
Wait for our next post.
Let's talk interiors!


Comments